
Introduction
Overview
This guide demonstrates how to replace the BIOS ROM chip in an Open Compute V2 server. == Acronyms and Terms == * BIOS - Basic Input/Output System * SATA - Serial ATA * ROM - Read-Only Memory * SFP+ - Enhanced Small Form-factor Pluggable; a type of data communications transceiver.
-
-
The server can be powered off remotely or on the hardware itself.
-
Remote Power Down: Login to the server to power it off.
-
shutdown -h now;exit -
Hardware Power Down: Press and hold the power switch for at least three seconds, as annotated.
-
-
-
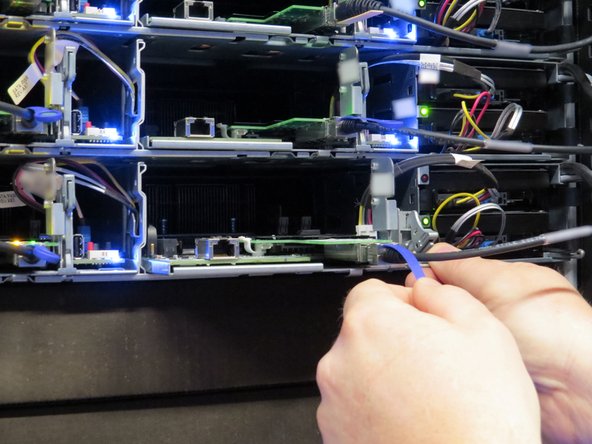
Disconnect the 10G SFP+ cable from the network interface controller.
-
Disconnect the SATA / power cables connected to the boot hard disk drive.
-
Node 1 (right-most sled) boot drive is the top drive in the chassis. Node 0 (left-most sled) boot drive is the bottom drive in the chassis.
-
Disconnecting the SATA / power cable can be performed on either the motherboard or HDD end of server node 1 . However, the SATA / power cable must be disconnected from the motherboard end on node 0.
-
-
-
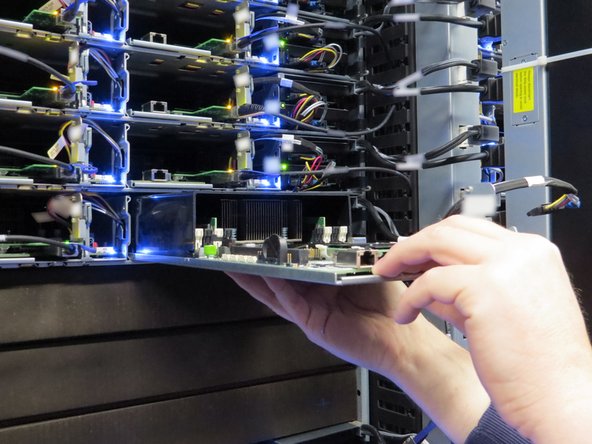
Locate and identify the BIOS ROM chip on the system motherboard.
-
The BIOS ROM chip is located just below the CPU 0 heatsink.
BIOS ROMis printed next on the BIOS ROM chip socket on the motherboard. -
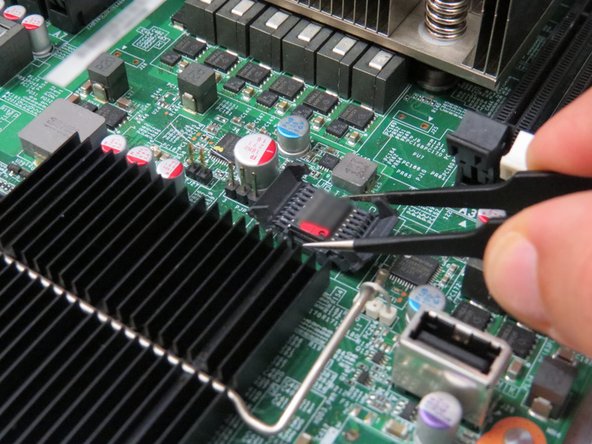
Lift the BIOS ROM chip cover.
-
-
-
Note the orientation of the BIOS ROM chip.
-
Important: A small orientation mark is printed near PIN 1 on the BIOS ROM chip. Note this orientation as the new BIOS chip will need to be installed in the same way.
-
You may also use the motherboard's silkscreen to determine the BIOS ROM chip's PIN 1 position.
-
-
-
Obtain a new BIOS ROM chip.
-
Place the BIOS ROM chip in the BIOS ROM chip socket.
-
Make sure the BIOS chip has properly seated in the BIOS socket. The BIOS chip should be firmly seated, and not loose.
-
Important: Ensure the orientation of the new BIOS chip reflects the old orientation (based on the circle polarity indicator).
-
Close the BIOS ROM chip cover.
-


This work is licensed under a Creative Commons Attribution 4.0 International License.
This work is licensed under a Creative Commons Attribution 4.0 International License.
Cancel: I did not complete this guide.
One other person completed this guide.
