Introduction

This guide describes how to replace a DC Power Delivery Unit in an Open Rack V2.

  1. Unseat all of the Battery Backup Units (BBUs) in both power shelves . There are three in each shelf and six total per rack. This reduces the risk of electric shock. Unseat all of the Battery Backup Units (BBUs) in both power shelves . There are three in each shelf and six total per rack. This reduces the risk of electric shock.
    • Unseat all of the Battery Backup Units (BBUs) in both power shelves . There are three in each shelf and six total per rack. This reduces the risk of electric shock.

    • Identify if there are two plugs per rack or one plug per rack.

    • You should be able to see two cords coming from the top of the AC PDU with the text 'TOP SHELF' and 'BOTTOM SHELF'.

    • The plug with the white color under the three-phase AC plug is for the top shelf.

    • Turn off the breaker above the rack.

    • Some racks may have two plugs per rack and one plug per each power shelf. If this is the case, both breakers will need to be turned off.

    • Unplug the three-phase AC plug from the tap box.

  2. Ensure that the green LED on the rear of the power shelf is not illuminated. A lit LED indicates 12V power from the bus bar.
    • Ensure that the green LED on the rear of the power shelf is not illuminated. A lit LED indicates 12V power from the bus bar.

    • If the 12V LED is not powered on, this indicates that there is no voltage on the rack bus bar. This will ensure a technician's safety when changing PDUs.

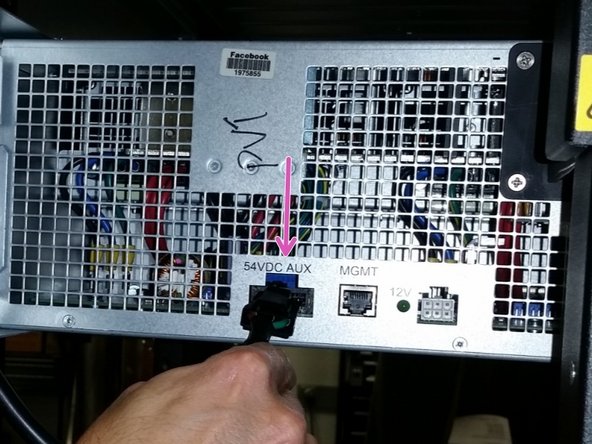
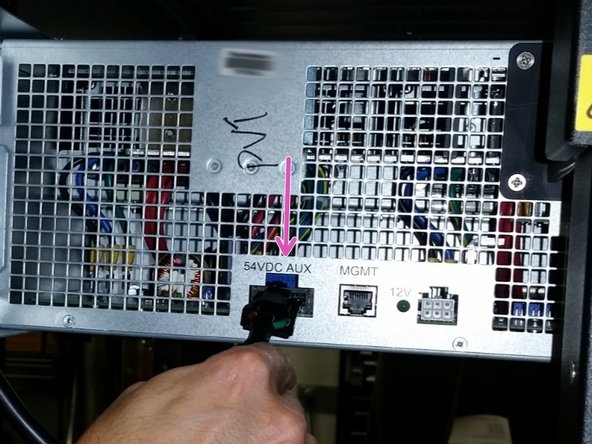
  3. Unplug the 3-pin connector from the back of each shelf.
    • Unplug the 3-pin connector from the back of each shelf.

    • '54V AUX' is the label on the power shelf.

  4. Remove any cables that are connected to the DC PDU. Remove any cables that are connected to the DC PDU.
    • Remove any cables that are connected to the DC PDU.

  5. Unlatch the two green tabs on the PDU from the top of the rack and remove the PDU.
    • Unlatch the two green tabs on the PDU from the top of the rack and remove the PDU.

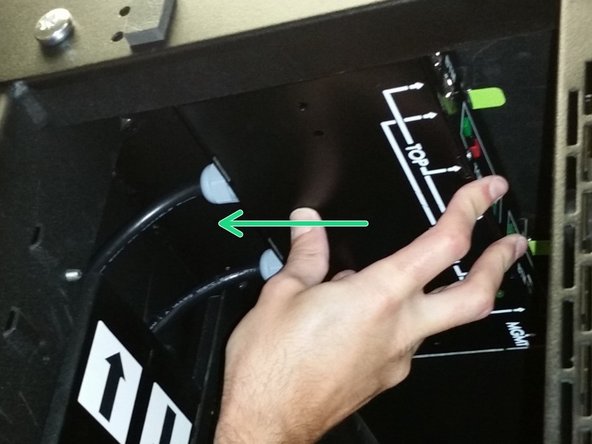
    • Guide the DC input power connectors into the side channels, then pull the cables out of the rack from the top.

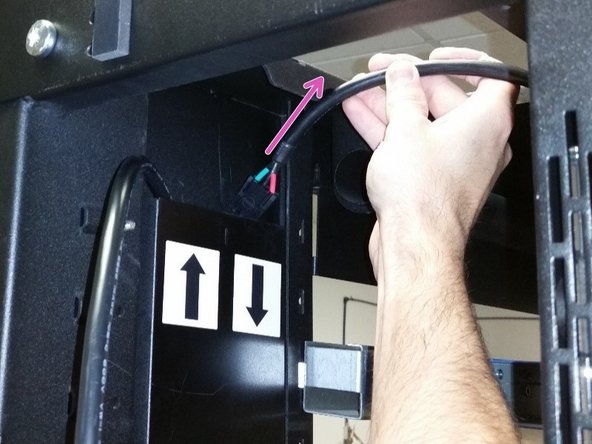
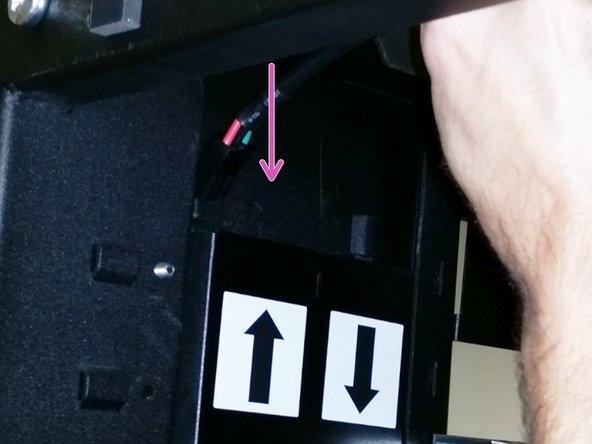
  6. Insert the shorter 3-pin DC power cable into the trough with the arrow facing up (for the upper power shelf).
    • Insert the shorter 3-pin DC power cable into the trough with the arrow facing up (for the upper power shelf).

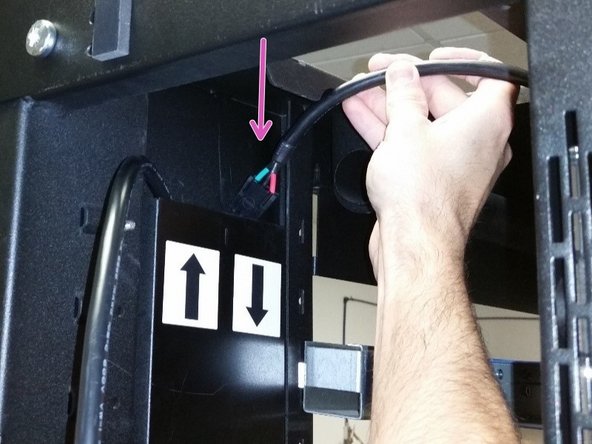
  7. Insert the longer 3-pin DC power cable into the trough with the down arrow (for the lower power shelf).
    • Insert the longer 3-pin DC power cable into the trough with the down arrow (for the lower power shelf).

    • Ensure that both DC power cables are fully inserted and are able to reach their corresponding power shelf.

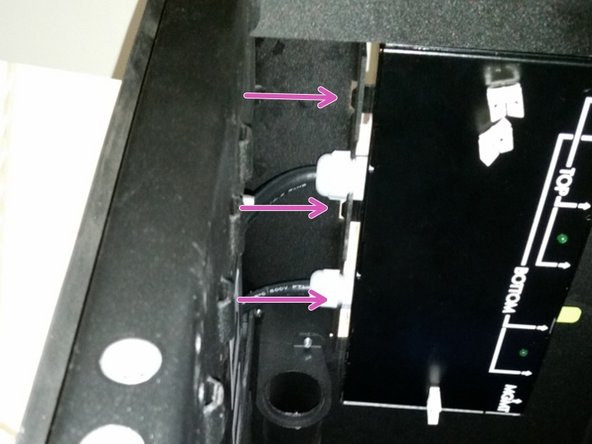
  8. Align the three DC PDU tabs with the slots on the roof of the rack.
    • Align the three DC PDU tabs with the slots on the roof of the rack.

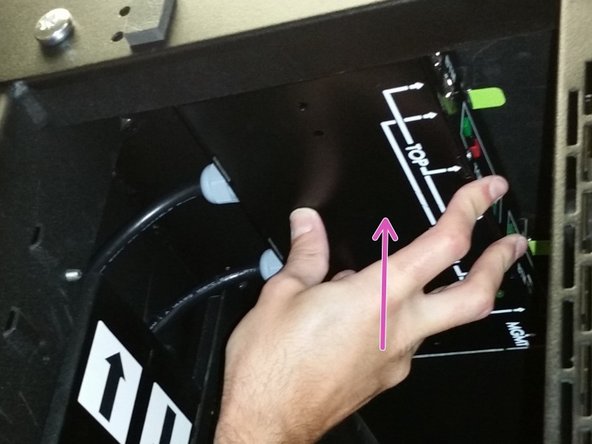
  9. Apply upward pressure to the bottom of the PDU until the two green latches are depressed by the roof of the rack. Slide the PDU towards the trough until the green latches snap into position.
    • Apply upward pressure to the bottom of the PDU until the two green latches are depressed by the roof of the rack.

    • Slide the PDU towards the trough until the green latches snap into position.

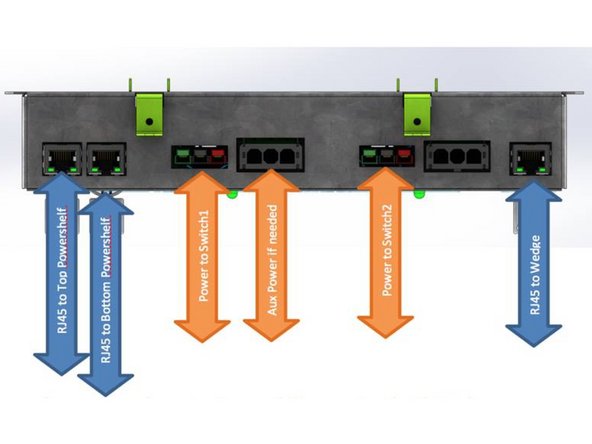
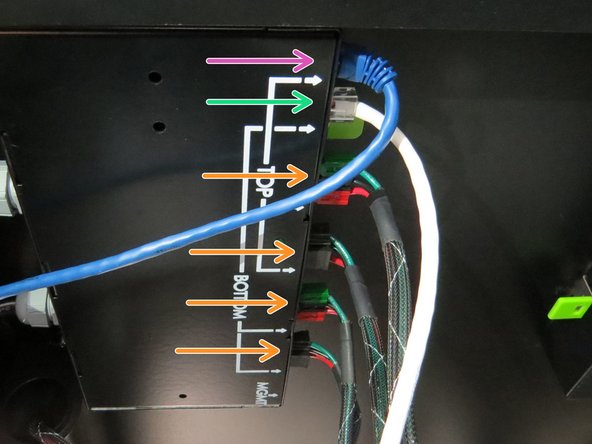
  10. Feed both the blue and white Ethernet  cables into the trough to their corresponding power shelf.
    • Feed both the blue and white Ethernet cables into the trough to their corresponding power shelf.

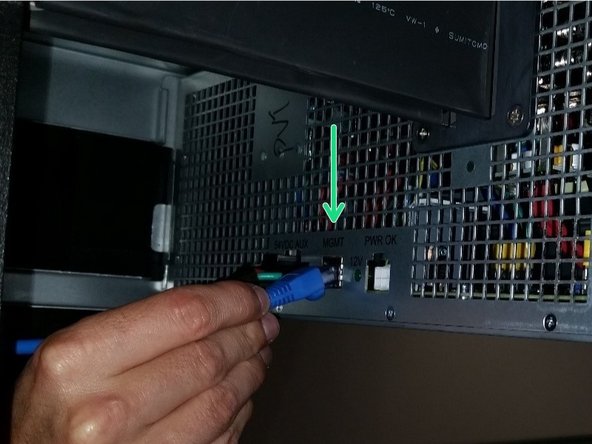
  11. Connect each 3-pin DC power connector to their 54VDC AUX ports. Connect each Ethernet cable to their management ports (these are labeled 'MGMT').
    • Connect each 3-pin DC power connector to their 54VDC AUX ports.

    • Connect each Ethernet cable to their management ports (these are labeled 'MGMT').

    • Connect the three-phase AC connector into the tap box.

    • Turn on the breaker.

    • Insert the BBUs back into the power shelf and the PSU LED should illuminate green.

Conclusion

Dozuki System

Member since: 09/24/2009

1 Reputation

142 Guides authored

0 Comments

Add Comment

View Statistics:

Past 24 Hours: 0

Past 7 Days: 0

Past 30 Days: 2

All Time: 339