
-
-
Perform a warm shut down on the server. Run:
-
ssh -l root <hostname> shutdown -h now
-
-
-
Disconnect the 10G network interface cable.
-
Pull the 10G network interface cable pull-tab.
-
-
-
Pull the green retention plunger upwards.
-
Pull the server away from the rack, as shown.
-
Pull the server until about (2) inches of the black lid is exposed.
-
-
-
The PCI riser card and assembly are defined as one Field Replaceable Unit (FRU) in the ORV1 Leopard assembly.
-
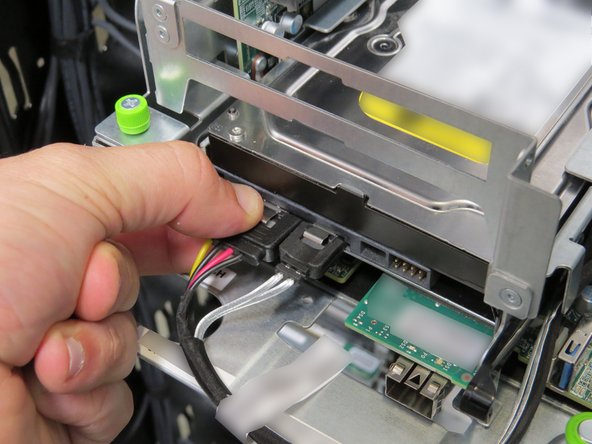
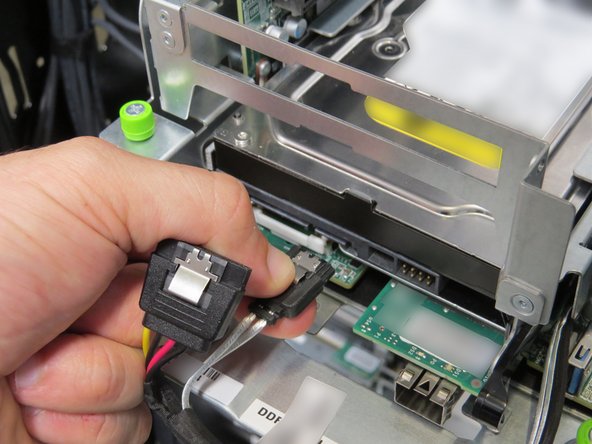
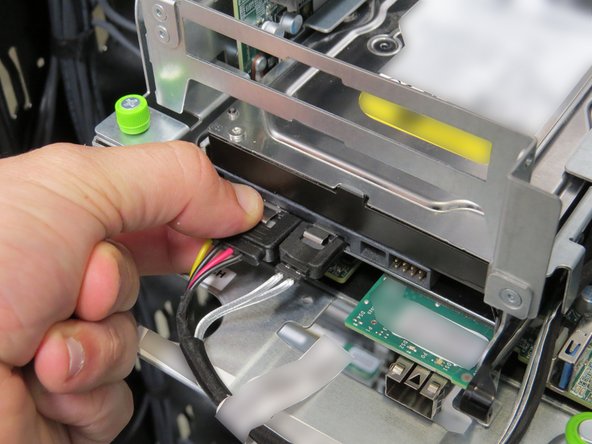
Disconnect the power and SATA connectors from the Hard Disk Drive (HDD).
-
-
-
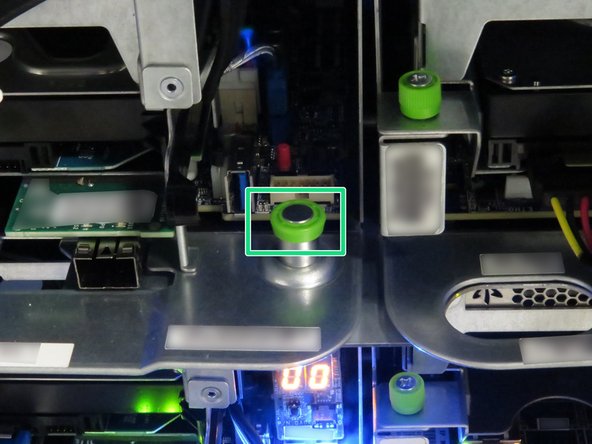
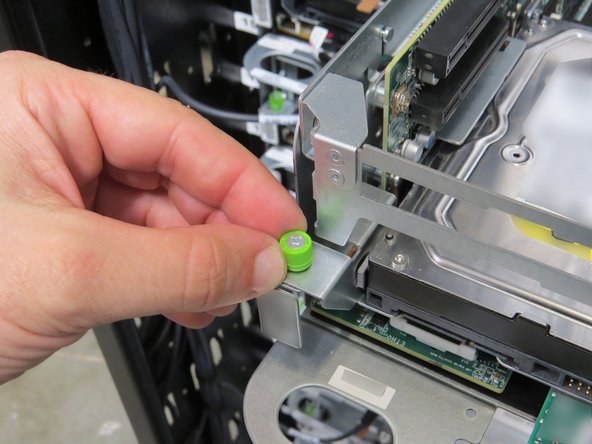
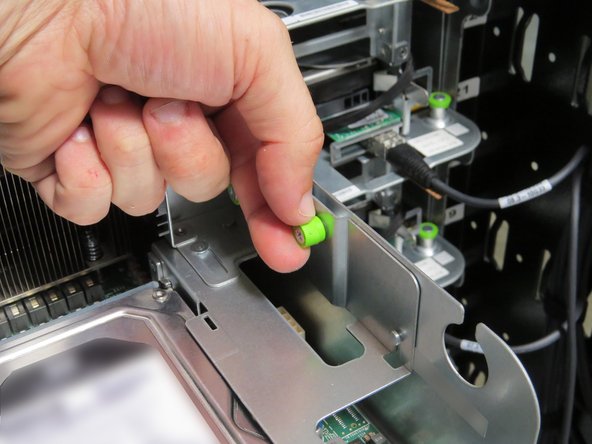
Loosen the (2) thumbscrews, shown.
-
-
-
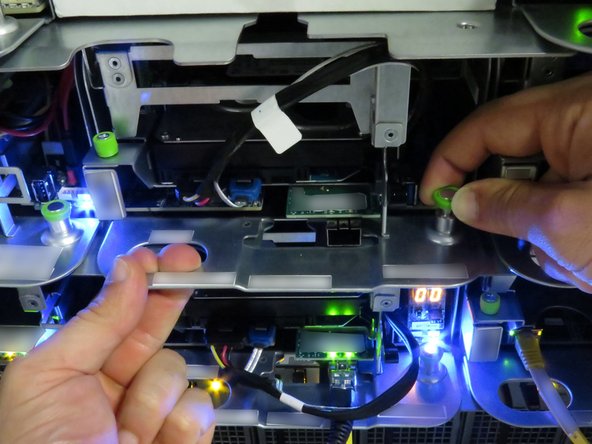
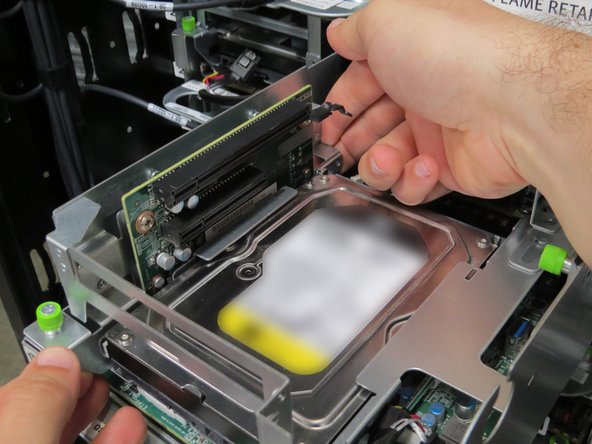
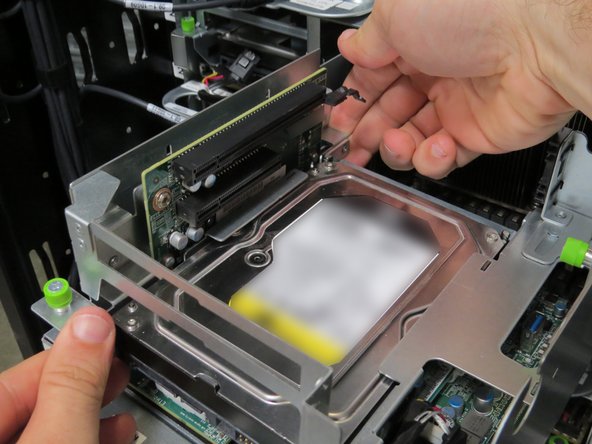
Engage the PCI riser card assembly, as shown.
-
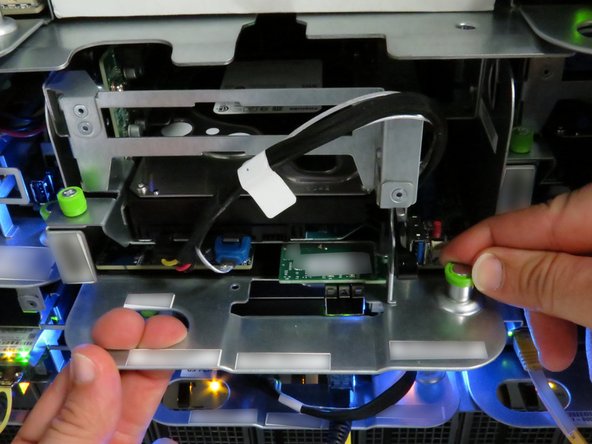
Push the PCI riser card assembly upwards.
-
The PCI riser card will be properly unseated when a distinctive 'click' is felt.
-
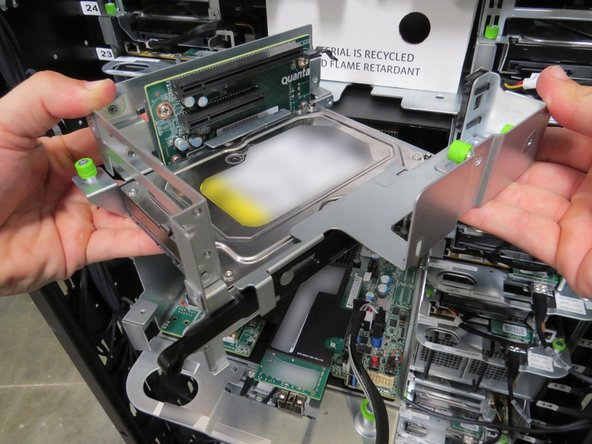
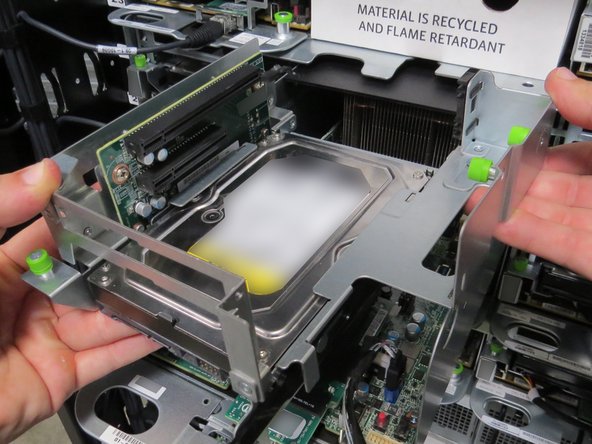
Remove the PCi riser card assembly from the server.
-
Place the assembly on the crash cart.
-
-
-
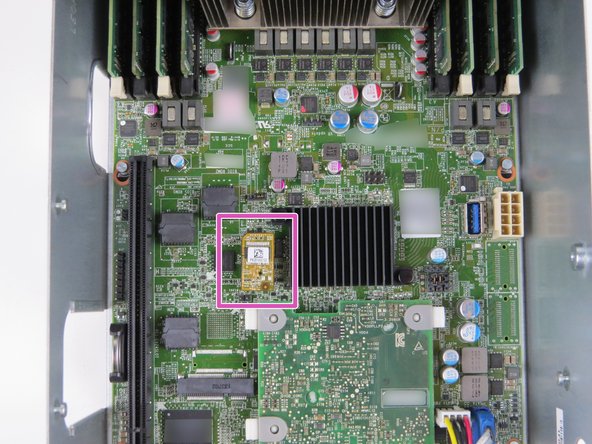
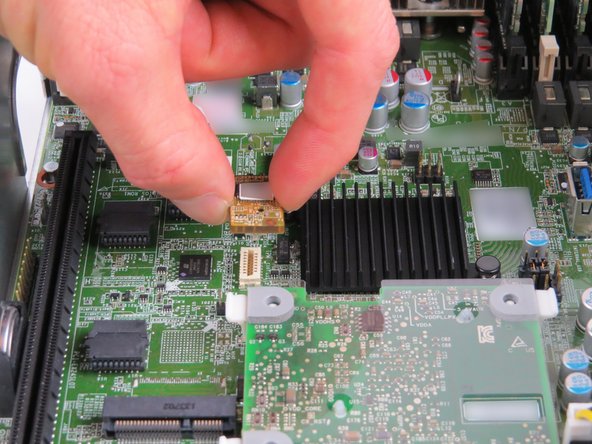
Locate the Trusted Platform Module (TPM).
-
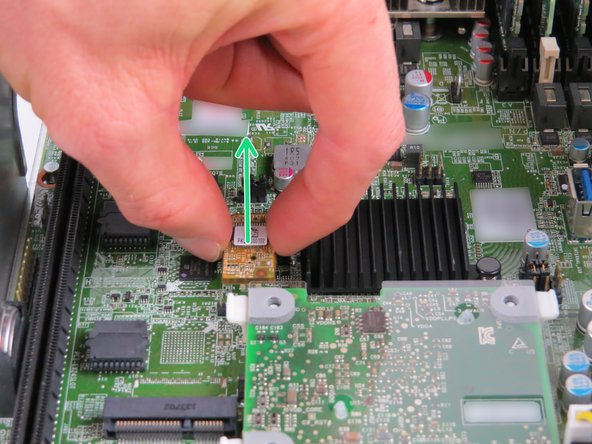
To remove, grip the module on each side, then pull upwards as shown.
-
-
-
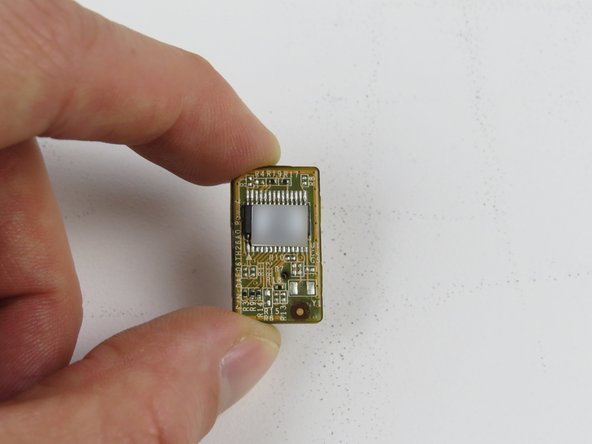
Scan the barcode located on the top of the TPM Module.
-
-
-
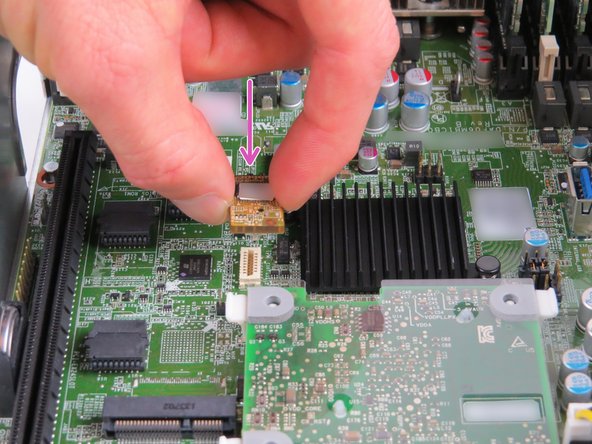
The TPM module and socket are keyed. Ensure that both are aligned prior to installation.
-
-
-
Once the TPM module connector has been aligned, insert it into the socket until resistance is felt.
-
-
-
Install the PCI riser card.
-
Connect the boot hard disk drive (HDD) SATA and power cables.
-
PCI riser card installation is opposite of the removal process.
-
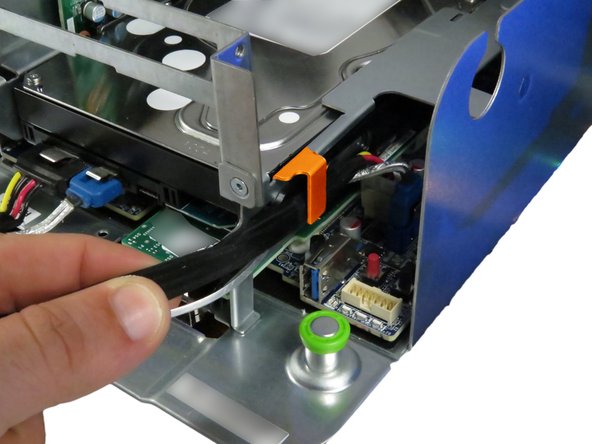
Route the SATA and power cable under the cable management tab, as shown.
-
-
-
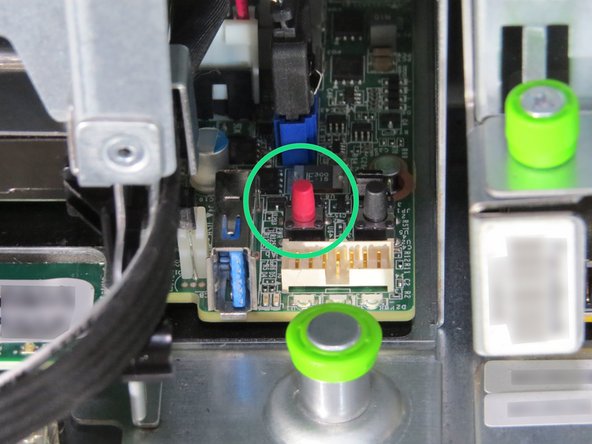
Press the power button.
-





This work is licensed under a Creative Commons Attribution 4.0 International License.
This work is licensed under a Creative Commons Attribution 4.0 International License.
